I have been wanting to share my Weight Watchers Maintenance Mode experience with you guys for a while, but I knew I needed to be able to maintain my weight as best I could before I shared anything.
And here's the exciting news. I have been able to maintain my weight for about 6 weeks. As great as it is to maintain your weight, there are so many challenges that I just didn't understand when I first started.
I love Weight Watchers and fully stand behind their Beyond the Scale program. I think SmartPoints are the best (better than Points Plus) because they limit your sugar intake and allow you to lose weight even faster. But SmartPoints also allow you to turn "weight loss" into a lifestyle, which is truly the key to success. This post, however, isn't about how much I love Weight Watchers. This post is about what Maintenance Mode is really like.
Here's the honest truth: Maintenance mode is hard!
Let me explain. I was losing about 1-2lbs a week when I was in Lose Weight mode. And it was easy to understand. I had 30 SmartPoints a day to use on foods that will keep me full and still eat what I love. It just made sense to me. And I could see the results right in front of my face when I weighed in.
Understanding Maintenance Mode
Switching the button on the app was so gratifying. This was a step I wasn't able to take when I tried Weight Watchers before (on PointsPlus). It's a huge milestone and should be celebrated. Don't take this for granted. Switching the button means that you have met your goal and are on the path to learning how to keep the weight off.
You might be surprised to learn that there isn't much documented about Maintenance mode on the Weight Watchers website. I found 2 articles about it before I switched. Just 2! Maybe there is more about it in the meetings, but for us online only subscribers, this is a problem to me.
It's great that you can adjust your daily SmartPoints target while Maintaining to keep you in the 2lb threshold. But what if I need 40 SmartPoints a day to actually maintain my weight. I haven't changed from the 36 they give you to start off with, but I could.
To refresh or learn more about Weight Watchers Maintenance Mode.
Why Weight Watchers Maintenance Mode is so hard?
It's hard because everyone's body is different. The way my body registers weight will be different from yours.
I feel like I am eating almost everything I was eating before I lost the weight. Now, this is an exaggeration, but hear me out. We recently went on a trip to Indiana to visit my husbands family and friends. It was a great time, but I ate and drank pretty much whatever I wanted, within reason. I didn't track anything except a quick mental checklist of the thin crust pizza and beer I was drinking. We ate out a lot and I just really wanted to enjoy myself and deal with the consequences later. Well, I lost weight during the trip. I couldn't believe it.
Besides not eating tons of carbs from fast food restuarants, I didn't really change what I used to eat before I lost the weight. Yes, I am much more mindful of what I am putting in my body and try to steer away from those cakes and brownies and cookies and carbs. But I'm human and realize that one treat won't kill my progress.
Hitting your Daily SmartPoints target is harder
My body was so used to eating 30 SmartPoints a day. I had a schedule. I liked my schedule and I really didn't want to deviate from it. But when I moved to Maintenance mode and had to start eating more SmartPoints, my body wasn't so happy. I lost weight the first week I was trying to maintain simply because I couldn't keep feeding my body the SmartPoints I was used to. Hitting that daily goal was much more difficult than I realized it might be.
As awesome as it is to have 6 extra SmartPoints a day, I didn't want to spend them eating junk or crap just because I thought I needed to use them up. Yes, I did that first week, but then I felt guilty the following week. So I changed my tune. I basically stopped tracking unless I needed to look something up. I haven't diligently tracked almost the entire time I have been maintaining, and I am still maintaining my weight loss.
It just didn't feel necessary to me to track if I knew I wasn't going to hit that daily target. I don't recommend this unless you are able to maintain your weight without tracking. (I also weigh myself every day – gasp – so I know if I am above or below my goal weight well ahead of my official weigh in day).
Overall, I am so pleased with Weight Watchers and the SmartPoints. I couldn't have lost the weight without this program, and if you know me in real life, you know I love to talk about Weight Watchers. And while maintaining my weight has been a challenge, maintenance mode is a place I would love to be in forever…it's insanely gratifying.
What are your thoughts on Weight Watchers Maintenance Mode?
Hanseceramictile.com is one of the most reliable online wholesale wood look bathroom tiles vendors in Foshan China, manufacturing high quality tiles at low wood look bathroom tile prices.
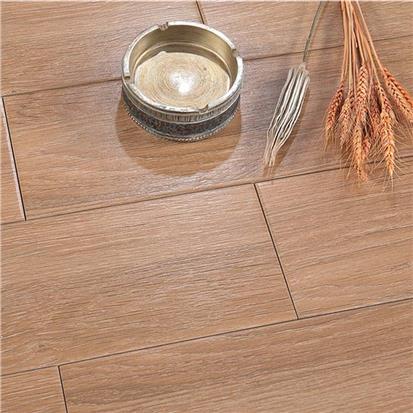
Wood Look Bathroom Tile designs contain 8 colors, 3 finishes, 2 features and 4 sizes, 25 wood look bathroom tiles in total.
All the hot selling cheap wood look bathroom tile products online are of strict quality and produced by standardization of the management.
Buy cheap Hanse wood look bathroom tiles for sale to add a touch of taste and personality to your house now!
In addition, gorgeous wood look tiles and bathroom tiles are available at Hanseceramictile shop. If you are looking for wood look tiles or wholesale bathroom tiles designs, you are at the right place! Welcome to buy floor tiles online from China Hanse!
Hanse - the professional Foshan China wood look tile manufacturer & supplier will continuously wok on improving the designs of our wood look tiles to ensure that you get the best import wood look tile products for your project!
Wood look tile gives a beautiful, organic, and unique look to home design. For durability and resistance to moisture, it's a fantastic option for bathroom floors and shower walls. With Hanse's wide range of superior quality cheap wood look bathroom tiles, nature lovers come at your cost!
Thanks to the state-of-the-art wooden tiles, we create a warm atmosphere and thus neglect the comfort in bathroom with wood planks. Instead of swelling like prolonged contact with water like wooden floors, wood effect tiles for bathroom wall/floor are insensitive to moisture. Ceramic & porcelain tile that looks like wood is resilient, water resistant, and so similar in appearance to the real wood, are therefore suitable for inner wet place and outdoor use. Wood like tiles give the bathroom the warm charm of a wooden floor.
The benefit to install porcelain wood look tiles in bathrooms is the ease of cleaning and maintaining it. No resurfacing, refinishing, waxing, or shining is required. Wood effect bathroom tiles also offer a unique opportunity to incorporate natural textures into your bathroom - something that would be impossible with natural wood floors, which are susceptible to water damage.
See All Wood Look Bathroom Tile Products
Bathroom Wood Tile Design Ideas
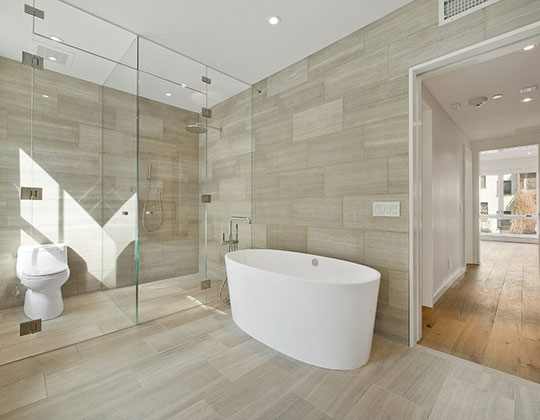
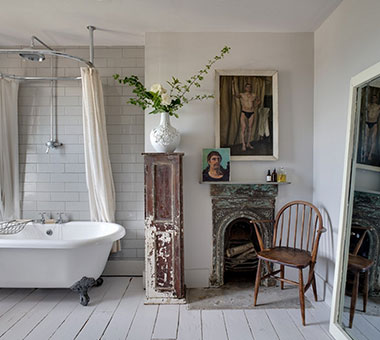
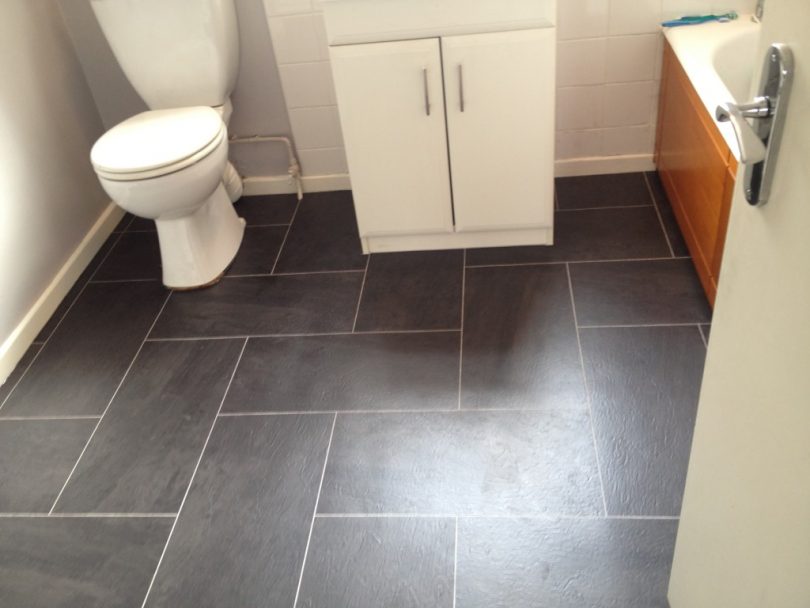
Retro bathroom flooring with wood like tile:
Retro bathroom features a reclaimed wood floor that adds to the aged style of the space. It adds warmth in contrast to the cooler grey subway tile and modern frameless shower, bringing a wonderful balance to the whole room.
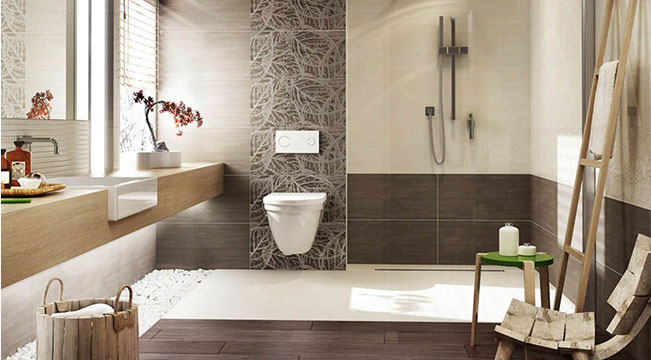
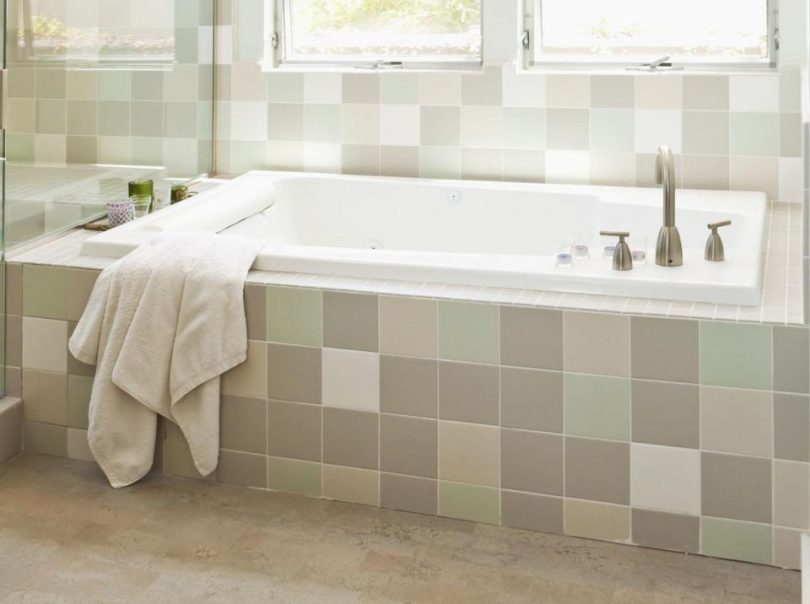
Natural bathrooms with wood like tile wall:
Embrace nature with a stunning new look in your bathroom using gorgeous wood-effect tiles on floors and walls. Whether you go for washed out greys paired with antique furniture or warm browns on walls that are complemented with green foliage, pulling off a natural aesthetic in bathrooms is a breeze.
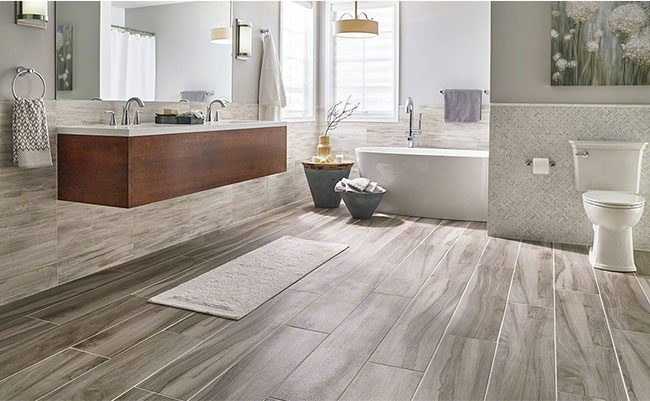
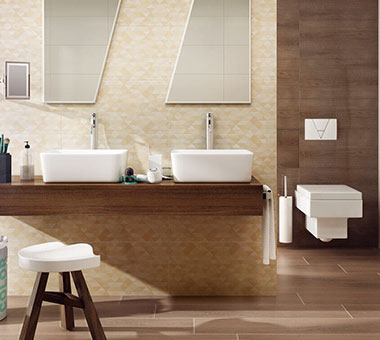
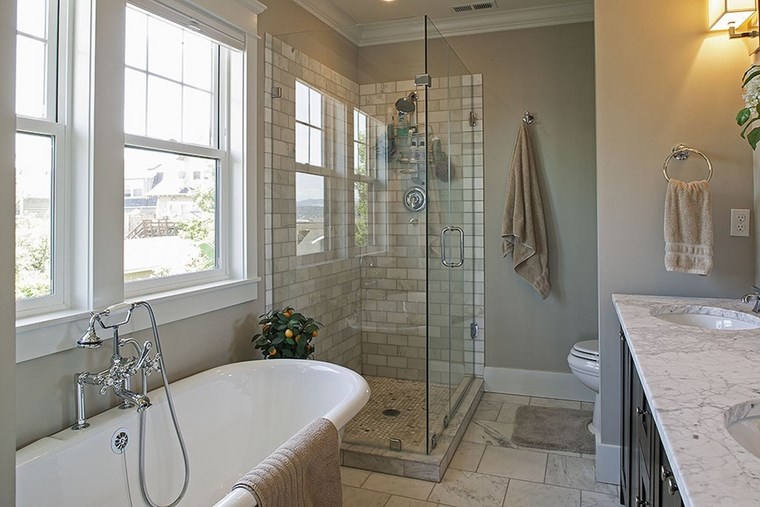
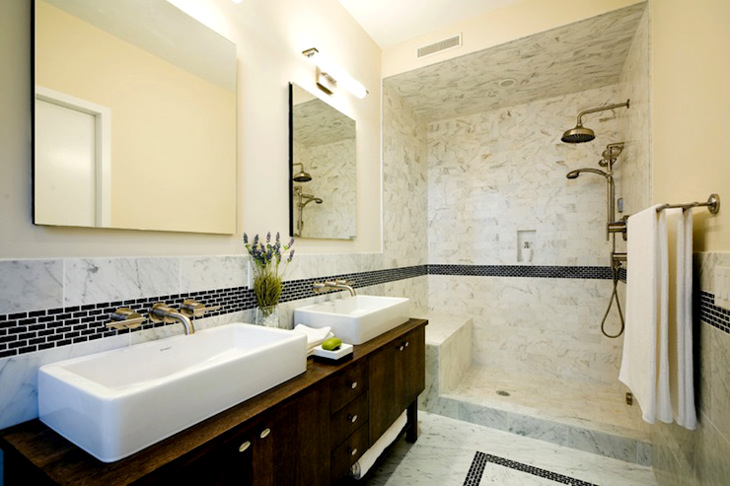
Classical style:
There's nothing like a traditional bathroom with classic feeling. Choose medium-tone bathroom wood tile flooring, match with the white and beige paint, the pedestal tub, and the marble countertop. The warm, beautiful wood effect floor brings it all together to make for a relaxing bathroom/shower space.
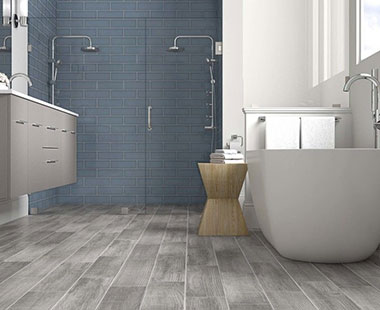
Shabby chic bathroom with wood tile flooring:
With prefinished wood effect tile flooring, wood wall decor and freestanding tub painted to look like oxidized copper. Choose the wooden separator screen pulls the whole together by providing privacy and adding style to the space.
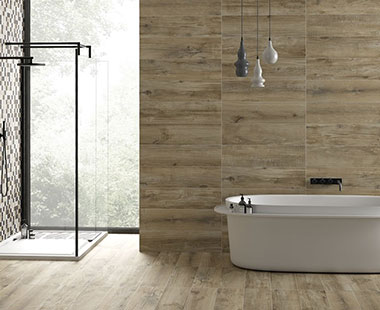
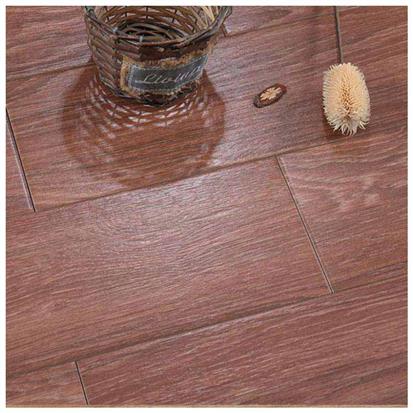
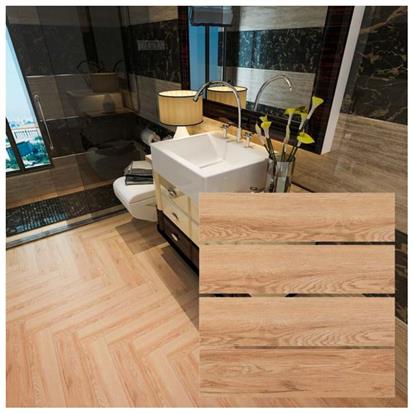
Larger floorboards bathroom:
Large format Shower wood look tiles offer a cool and contemporary finish - ideally suited to neutral and earthy colour schemes in bathrooms. Available in three popular colours - pale white, sleek grey and dark brown - you can create an impactful wood-effect tiles bathroom that are incredibly easy to match up with your existing home decor.
Hanse wood bathroom tiles for wall/floor create the perfect and comfortable bathroom for you to relax your body and mind. Our extensive range of bathroom tiles in wood look is a perfect alternative. Hanse bathroom wood look tile series inspire on the one hand with their wonderfully natural appearance and, thanks to their insensitive material, are used as tiles for the bathroom (shower) more and more common use. So if you want to give your bathroom a touch of nature, when choosing the bathroom tile, there is no way around Hanse wood effect shower tiles.
Why Choose Wood Bathroom Tiles Hanseceramictile?
Great quality, durable, versatility and great performances
nsensitive, non-slip and easy to clean, install, and maintain
Factory direct prices, cost-effective OEM production
KEUCO - A full range of bathroom fittings that are a cut above the rest
KEUCO can look back on a long tradition of producing high-quality products for the bathroom. Since its foundation in Hemer in 1953, the company has continuously expanded its range of products. KEUCO has gone from being the original specialist and market leader for high-quality bathroom accessories to presenting itself as a full-range supplier of bathroom furnishings including fittings, accessories, mirror cabinets, bathroom furniture and washbasins, which are produced at the Hemer, Gütersloh and Bünde sites.
Each individual KEUCO product lives up to a promise: To bring together intelligent functionality and first class quality in a design that won't lose any of its charm even after five, ten or twenty years. That is why people never tire of delighting in the sight of KEUCO in the bathroom again. And that is why customers around the entire world put their trust in us.
Keuco products are manufactured at their own production plants in Germany, to a meticulously high standard and finish. They are a result of the best materials, and most careful workmanship.
Keuco products will convince you by their immaculate surfaces, maximum longevity, and perfect functionality.Each item is examined individually before being shipped to the customer.
Keuco Bathroom Mirror Cabinets:
A stunning range of illuminated bathroom mirror cabinets, crafted to the highest standards of perfection. Harmonious form, soft brightness and flexible storage space: KEUCO mirror cabinets combine practicality with timeless beauty. Regardless how much you need to store, everything will find its place behind the elegant mirror doors inside the high quality aluminium carcass.
Keuco Illuminated Mirrors:
KEUCO mirrors and illumination always show you in the correct light in the bathroom – and without dazzling your eyes at the same time. Our well-thought out arrangements create the right ambience for every setting: an ambience to feel good in.
Keuco Crystal Mirrors:
Wide selection and best quality: the crystal mirrors of KEUCO are available for the editions or series-independent.
Keuco Bathroom Accessories:
For KEUCO, accessories aren't just a side effect, but an integral ingredient of the overall concept. We have developed many accessory collections that harmoniously compliment the many different bathroom series from KEUCO.
To browse the full range of Keuco products click here: Keuco Bathroom & Wetroom Products
The poor design, construction and décor that's common in many old mobile home bathrooms has always been an issue. Throw in the inevitable water damage and what you have is a room you can't wait to see for the last time.
There are many approaches you can take when you embark on a mobile home bathroom remodel. However, you can only go with one approach, so you'll want to get it right the first time around. But before you even start on the remodeling, there are a few things you have to factor in.
Preliminary considerations
Remodeling a house or a room usually starts with a bit of demolition or taking out a few things from the room. In most cases, once you start the process of remodeling, there is no going back. It's therefore important that you proceed in the right direction right from the beginning.
If you start on the wrong footing you could end up doing the same thing several times and still end up with a barely satisfactory result. Therefore, before you start ripping out floors and tearing down walls, you'll have to consider a few things.
Budget
There is no fixed cost when it comes to remodeling a bathroom or any other room. It will all come down to the decisions you'll make when you decide to remodel. If money is no object then you'll have much more flexibility.
However, most people will not have the financial freedom to get anything and everything. The best approach is to decide exactly how much you're willing to spend on the remodeling and then figuring out what can be done within that budget.
Time
Time is an important factor when remodeling your mobile home bathroom. You may not be able to use your bathroom while it's being remodeled.
This could mean having to move out during the renovation process or hiring a portable bathroom for this period and this will bring additional expenses. Factors that affect how long it will take to remodel your bathroom include:
Amount of work to be done: If the level of remodeling is going to be extensive, this will mean more time will be needed to complete the job.
Availability of funds: If you can't get the money to pay the experts or to buy materials at some point, this will greatly slow down the speed of the job. It's a good practice to have all the funds needed for the renovation before the work begins.
Contractor
Depending on the kind of remodeling you're doing and your ability to work with your hands, you may need to bring in a contractor at some point. Hiring the right contractor is vital to achieving your target within time and budget. If you'll need a contractor, take time to properly research the available alternatives.
Find out what previous customers had to say about their work and also check they are insured. A lot of things can go wrong during a simple remodeling job.
Permits
You may see your remodeling job as something too simple to require a permit, but in many places, certain types of jobs, no matter how small, will require you get a permit. In the case of a mobile home bathroom, any remodeling that involves removing a load-bearing wall, changing the plumbing and electrical lines or has anything to do with the sewer will probably require a permit.
Because such changes can have a serious effect on the health and safety of the occupants of the house, the finished work will have to be inspected by someone from the local authority.
It starts with a good design
The simplicity of a bathroom can be quite deceiving. Due to its size, you may be tempted to think there is no need to do much in terms of design. However, a well-designed bathroom can be the difference between a room that is just functional and one that provides you a space that you look forward to relaxing in.
Furthermore, proper design can also help to cut down on a few unnecessary expenses.
Mobile Home Bathroom design considerations
Space: Depending on how big your mobile home bathroom is, space is likely to be a big issue. To make the job as simple as possible, the design should be limited to the space already available within the existing bathroom. Any additional space may mean taking down a wall and this is something you should always try to avoid.
Functionality: There are many simple mistakes you could make that could greatly reduce how functional your bathroom is. Putting your toilet paper holder a little too high, putting a vanity too close to the door and other such mistakes will make your bathroom a tough space to maneuver around.
Location of utility lines: Any changes you make to plumbing and electrical lines will mean additional expenses and will probably require a permit. As much as possible, try to design the remodeled bathroom around the existing utility lines if you wish to cut down on certain expenses.
Amount of work to be done: When you're only focused on the final design, you may fail to see the amount of work needed to achieve it. Putting in a new sink may not seem like much, but you may fail to see that you'll need to run extra plumbing lines. Removing your popcorn ceiling seems simple enough until you realize you may be exposed to asbestos. Ensure you understand all the work, expenses and risks involved in getting from what you have to the design you're trying to achieve.
Décor: Décor is an underrated part of achieving a functional design. Many people see proper interior design as an unnecessary expense, but the colors and textures of bathrooms go a long way in setting the mood. There are also many inexpensive ways of achieving a beautiful finish inside your bathroom. Carefully consider the form and color of anything you're bringing into your new bathroom.
There are free online tools you can use when designing the layout of your new bathroom. These online tools can help you to see what will fit inside your bathroom and how you can position the sink, toilet, bathtub or shower etc. Some of these tools allow you to model your rooms in 3D so you can see what your bathroom will look like at the end of the job.
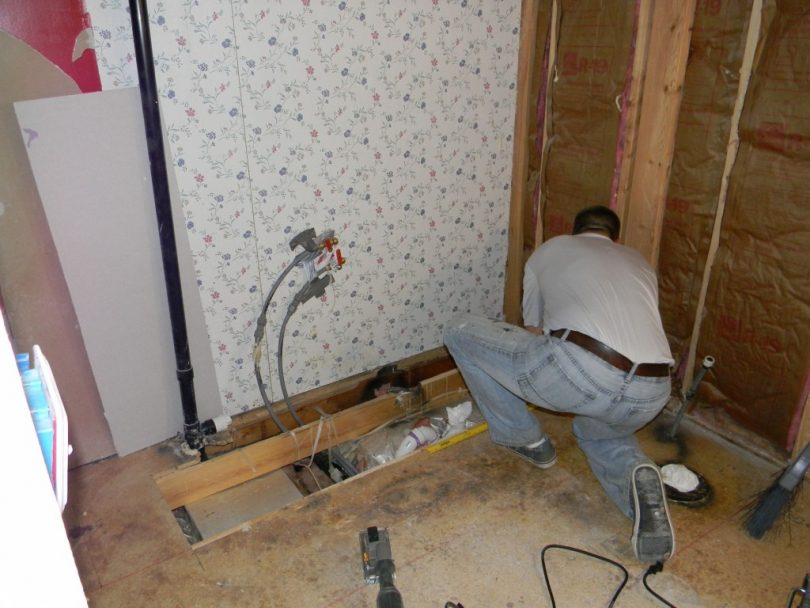
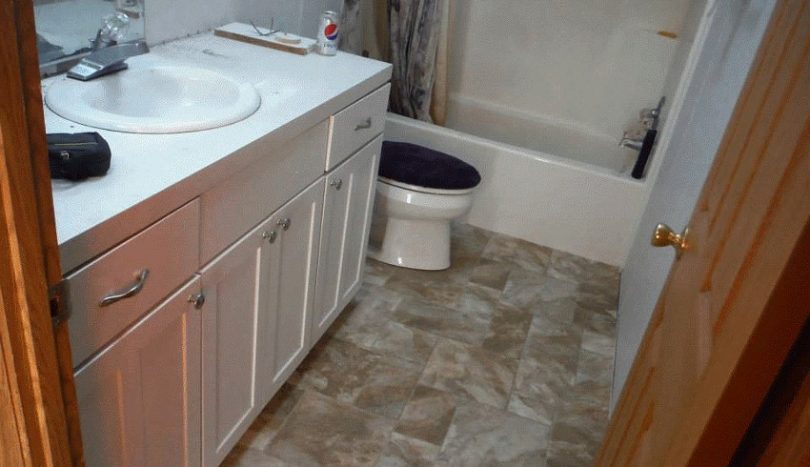
Replacing the floor
The floors in mobile home bathrooms are some of the most commonly replaced parts of the houses. The subfloor in many old manufactured homes was made from particle board.
Particle board is highly susceptible to moisture and even a small leak will quickly result in rotting, build-up of mold or sponginess. Thus, it's common to see people replacing floors when remodeling their mobile home bathrooms.
Although replacing the floor isn't a highly technical job, it is rather tedious which is why most people would rather leave this to a contractor. Important points to note while replacing the subflooring are:
Don't cut any joists while removing the subfloor. Joists help to support the floor and damaging them could weaken the floor.
Know the location of plumbing and electrical lines to avoid damaging them. Plumbing and electrical lines usually pass underneath the subfloor and damaging them could be an expensive mistake.
Repair any damaged joists. The leakage may have caused some of the joists below the floor to rot or become weak. Ensure these are repaired otherwise you may find yourself taking out the floor again in a few months.
Use this opportunity to repair any leaks especially if such leakages are the reason behind the damage to the subfloor. With the floor removed you should have easier access to plumbing lines.
Use this opportunity to put additional insulation on the floor. This is an inexpensive move that could have significant energy savings in the future. Ensure the insulation goes underneath the utility lines so that heat from the home can still reach the pipes.
The material used for the new subfloor should be as water resistant as possible. Plywood is more commonly used nowadays since it's much more resistant to water damage compared to particle board.
Replacing the subfloor can be a very long process. There is no need to replace the subfloor unless it's actually damaged or of very poor quality. If your subfloor is in good condition, focus on replacing the actual floor surface.
There are several flooring options that you can choose from apart from a carpet. You'll want materials that have good water resisting qualities.
Linoleum, cork and vinyl are some of the most commonly used flooring materials. Linoleum and vinyl are available in many colors, which is good if you're going for a certain color scheme. Cork is made from wood but it's a bit more expensive.
Putting in the shower base i.e. the floor in the shower area is a sensitive job. You'll want the subfloor and everything underneath the shower to be unaffected by the water. A shower tray is usually used for this. Shower trays are made from various materials including acrylic, fiberglass and concrete.
Proper installation of the shower tray requires proper leveling to ensure proper drainage and to reduce shifting in the future. There must also be no leaks otherwise the water can cause damage to the wood underneath. This is one job you may want to leave to the experts. With the right backing you can even put in tiles.
Remodeling the walls
Bathroom walls are exposed to moisture, which can lead to growth of mold overtime. This makes them unattractive and unhealthy. Depending on how much damage has been done, dealing with your walls can be as simple as applying a fresh coat of paint or having to replace the drywall with something else.
If you have to replace the drywall, use an alternative that will last longer, such as sheetrock. If instead of drywall, your walls are paneled, you'll need to apply a primer before repainting.
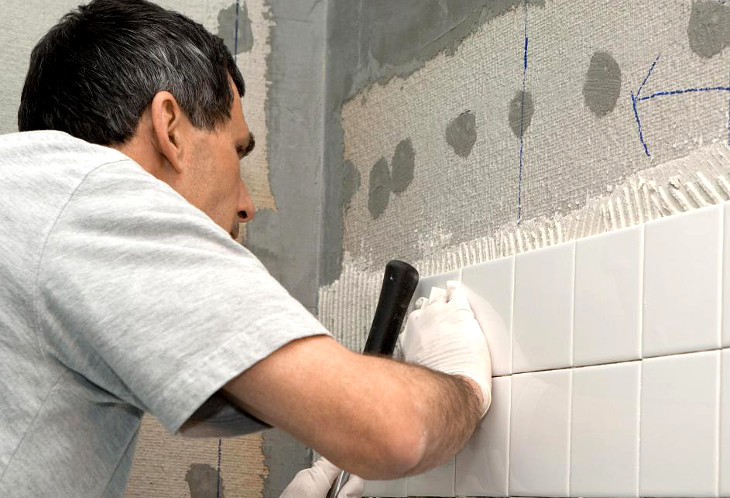
The walls in the shower area should, ideally, be tiled. Tiles, when installed by a professional will offer much better protection against moisture which would otherwise be a big problem in this area.
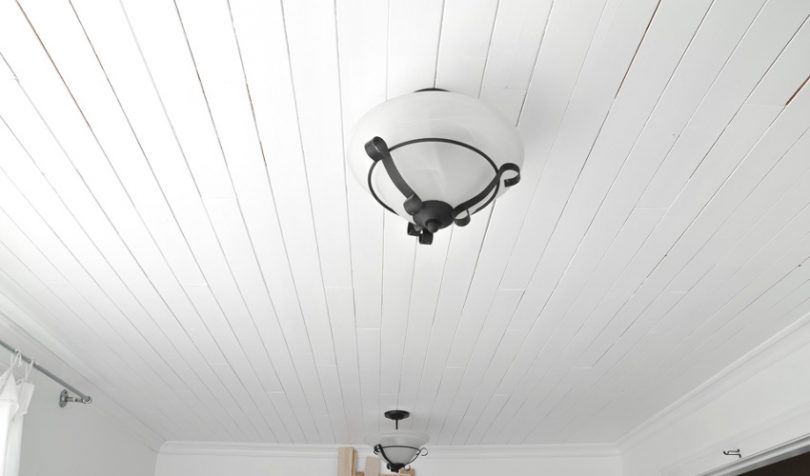
Replacing the Ceiling
Replacing the ceilings in bathrooms is sometimes necessary especially in old manufactured homes. Many materials used for the ceiling in the earlier models of manufactured houses have proven to be problematic over time.
Popcorn Ceiling: This type of ceiling was popular back in the day, but the use of asbestos in many of the ceilings means that most people are now looking to remove them. They are also easily damaged by water.
Drywall: Drywall easily absorbs moisture, and this makes it susceptible to damage and molding.
Acoustic tiles: This ceiling material also absorbs water quite easily, and this causes them to sag quickly.
Nowadays, using sheetrock or water resistant tiles has become much more commonplace.
Sheetrock is a type of drywall that has a paper covering that helps it to resist moisture. It can also be treated with chemicals that inhibit the growth of mold. This ceiling option can be used for the whole bathroom and not just the shower area. Installing sheetrock is easier than installing tiles. However, you have to ensure the screws are the right distance apart since sheetrock is quite heavy. Proper ventilation is important even when sheetrock is used since it can't keep out all the moisture. An exhaust fan should be used especially if there is no window.
Water resistant tiles are another good option for the ceiling. Tiles are particular well suited for the shower area where there'll be a high degree of dampness. A cement board backing will be needed to properly install the ceiling tiles. You can also use a sheetrock backing for easier removal later. Working with tiles requires a lot of expertise to ensure there is no sagging in the future and that there is uniformity in the pattern. Therefore, it's usually advisable to let the professionals handle this particular job.
Showers and tubs
Showers, tubs, toilets and sinks are the primary functional units in the bathroom. Because most of these are bought as complete units, replacing them is usually a quick and easy process.
However, due to the cost of buying the individual units, you have to ensure that you buy the right thing. Function, space, style and cost are the four guiding principles here.
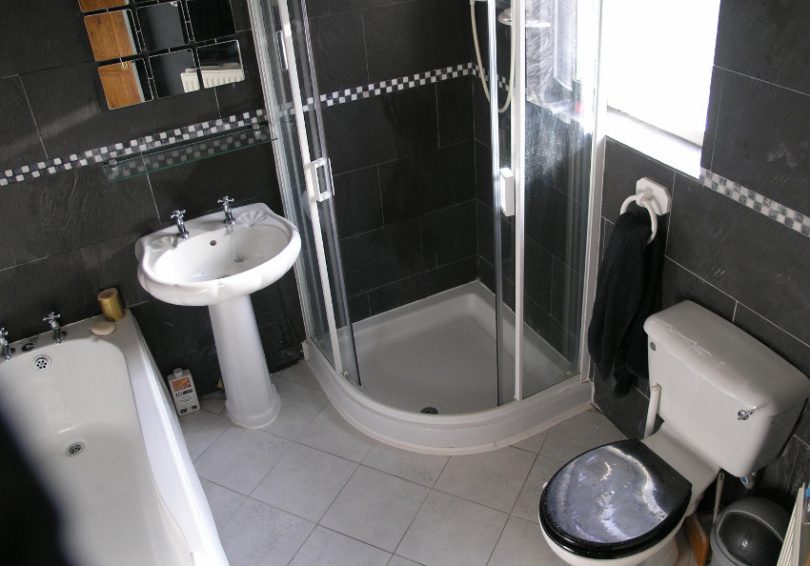
Shower or Tub
This may come down to individual preferences but when you're working with limited space, a shower makes a lot more sense. There is also the shower/tub combination, which is always good if you want the best of both worlds.
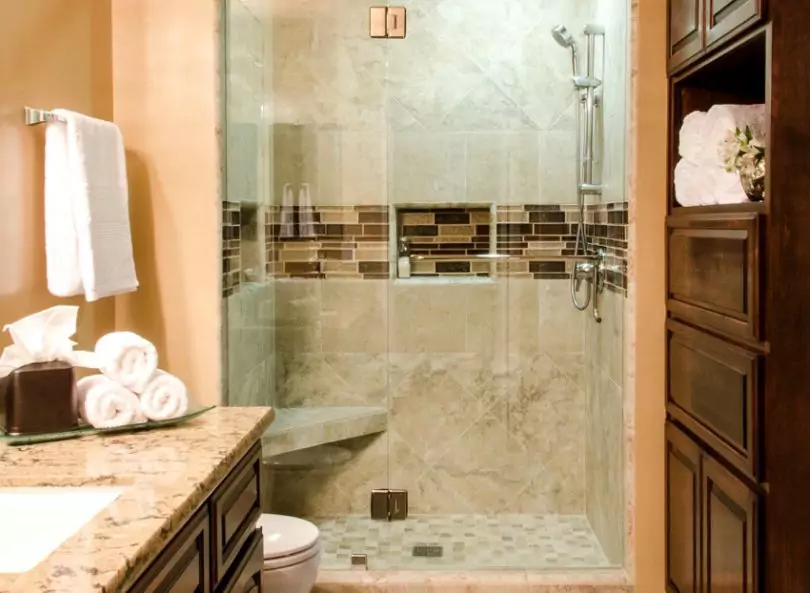
Open or closed shower
An open shower doesn't have a physical barrier separating it from the rest of the bathroom, and a closed shower is enclosed from all sides. In terms of style, the better alternative will be down to the individual user.
However, functionally speaking, the closed shower opens up the rest of the room to other uses. This means that items such as toiletries and cabinets which may otherwise be affected by water can still be conveniently kept or used in the bathroom.
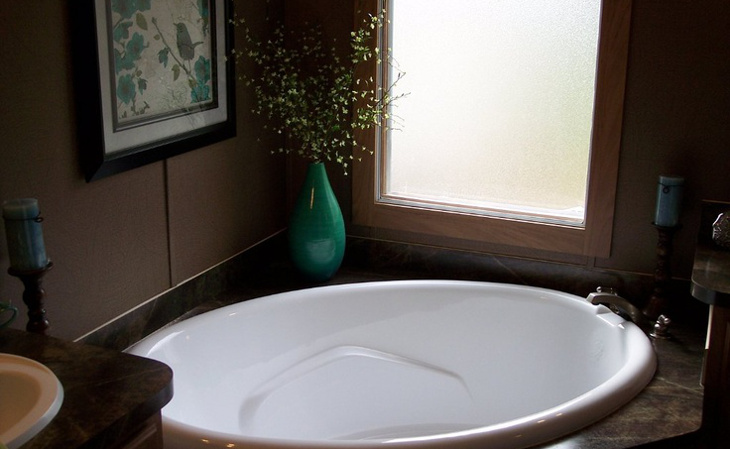
Bathtub alternatives
A good bathtub has always been a symbol of luxury because it's the one place you can relax and really look relaxed. There is a wide variety of bathtubs that you can choose from depending on your budget and the space available to you.
Freestanding tub: These bathtubs aren't connected to any wall and there's nothing separating them from the rest of the room. Since they need some sort of buffer space around them, they usually take up a lot of space.
Alcove bathtub: This is the cheapest alternative and also the one that takes up the least amount of space. This type of tub fits into a three walled enclosure against a wall.
Drop-in bathtub: This is like the alcove bathtub except it's enclosed by four walls and this tub can be used even in the center of the room.
Corner bathtub: This option has more to do with luxury than function. They are similar to the alcove bathtub but are designed to fit in the corners. There are typically designed to accommodate two people.
Apart from the standard options listed above, there are a few extras that can be added to your bathtub such as LEDs (chromatherapy), speakers, jets and bubbles and digital controls. These extras are however unnecessary if you're on a budget.
Deep tubs are designed so that your body can be completely immersed while seated. This also allows them to take up less floor space.
Sinks and cabinets
No bathroom would be complete without a sink. There are many options you can go for when choosing the right sink for your bathroom.
Pedestal sinks: This is sink that stands on its own and isn't attached to the wall. It takes up some floor space.
Self-rimming sinks: These can be easily mounted onto existing counters. They are very easy to install.
Vessel sinks: These are bowl shaped and sit on top of the counter surface.
Undermount sinks: These are installed below a solid countertop
Wall-mounted sinks: These are mounted directly on the wall and leave space below them
Console sinks: This is a sink that is mounted on the wall but also has two or four legs. Shelves can be attached below them to create extra storing space.
Cabinets
In a bathroom with limited space, cabinets provide valuable extra space that can be used for storing anything from toiletries to medicine. Cabinets can be placed on the floor or mounted on walls. It's important that even when adding cabinets, they also fit in with the design of the rest of the room.
The space below sinks is a good place to put in a cabinet and shallow sinks will allow for more storage space underneath. Instead of cabinets, you could also go for shelves for a more accessible storage space. A small cabinet on the wall in front of the sink can be concealed by attaching a mirror to the door.
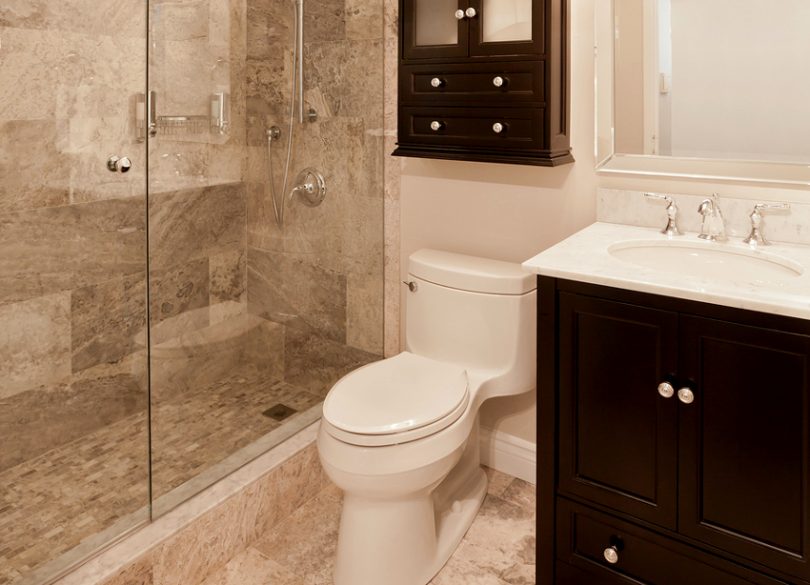
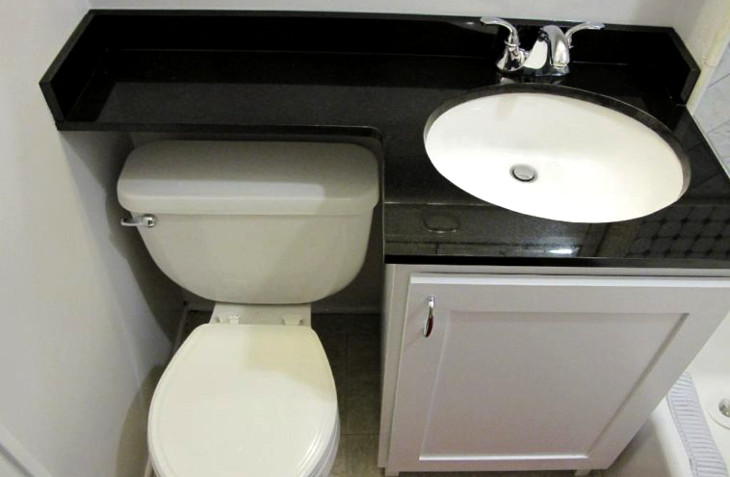
Toilets
There are several options to choose from for a new toilet for your mobile home bathroom and these can greatly boost the style of your bathroom while also taking up less space.
Short projection toilet: This toilet doesn't project as far from the wall thanks to a flatter cistern design. This means it takes up less space.
Fully shrouded toilet: The whole toilet sits flush against the wall and the associated plumbing is encapsulated leading to a neater design that is easier to clean and doesn't project that far from the wall.
Combined units: These are toilets that are combined with a sink and a storage cupboard. These are great for saving space and creating spaces where you can store a few things.
A toilet with a concealed cistern is also a great choice in terms of style and it also takes up a little less space compared to conventional units.
Remodeling to last
Many people have found themselves having to do repairs or extra remodeling only a few months or years after doing the same. This is normally because of choosing an unsatisfactory design, choosing the wrong accessories or ignoring structural issues during the remodeling process.
Starting your remodeling from the floor ensures that the other changes you make will be made on a sound foundation. Your walls and ceilings may also need maintenance or replacement.
Once you're done with the floors, walls and ceilings you can now work on the functional parts of the bathroom. At this point, your own choices will determine what you'll end up with. The best way to ensure you get a result that you'll be satisfied with is to start off with good design for the whole bathroom.
What are your experiences remodeling bathrooms? Do you have any questions that weren't addressed in this article? Let us know by leaving a comment below.
From the cabinets in your kitchen to a piece of furniture to a fun craft, there are plenty of wood items you can paint. And one of the best things about wood is that it accepts a variety of paints well, whether you opt for something that's acrylic or an oil-based formula. Painting wood is an easy way to change its look and give it some new personality, but it's not always clear what paint to use for different projects and applications. Here's what you need to know about the right paint to use for wood.
What's Your Project?
First, it's essential to figure out the nature of your project, meaning you'll need to determine not only what you're painting but also where it's located or going to be used. Are you painting shingles on the exterior of your home? Or are you painting an outdoor deck that'll see a lot of foot traffic? How about kitchen cabinets that people will touch often, or a bathroom shelf that'll be exposed to high humidity from the shower?
Knowing things like whether or not it's going to get wet, how often someone's going to use it or touch it and what overall effect or look you want to achieve are all essential for determining what paint you should use for the project. Wood accepts a very wide range of paints and stains, but each of those can have differing levels of durability and protection. Some paints are better than others in certain situations, and you'll need to know your particular situation before you make your choice.
Paint Types and Formulas
The great thing about wood is that, as long as you apply primer to it in most cases, any type of paint works well on it, depending on what function you need your project to serve. Generally speaking, paints to use on wood are water-based or oil-based. Acrylic and latex are the two most common types of water-based paints, while oil-based paints fall into two categories: synthetic or natural. Each of these is better than others for specific applications.
Latex paint is quick-drying, easy to clean and better for the environment than other types. It's also less likely to discolor over time. However, it's not the most durable choice, as it can scratch and chip easily. It's best for indoor wood items or surfaces that you won't touch or use very often, such as rarely used furniture, storage cabinet doors, stair spindles and picture frames. Latex paint is often the most affordable type.
Acrylic paint is ideal for home exteriors, although you can also use oil-based paint here. If the exterior is made up of different materials, such as stone and wood, you're better off choosing acrylic. Materials like stone and masonry need breathable paint to allow moisture and water vapor to pass through, and oil-based paint prevents this. Acrylic craft paints are also widely available and easy to use and clean up if you're doing a simple DIY craft project using wood.
Synthetic oil paint, which is also called alkyd, is the best choice for applications where you need a lot more durability. Think everyday furniture that'll get used and jostled often, kitchen and bathroom cabinets, interior trims like baseboards and door frames that'll get kicked and touched often, and flooring indoors and out. Oil-based paints are more rigid than flexible, water-based types so they're less likely to chip — even when people are walking on them — and they're also easier to wash clean because of this.
Natural oil paint, called linseed, is best for craft projects on which you want to create a warm, aged patina. It's typically much more expensive than the synthetic variety, which is why it's best for smaller projects.
Prepping for the Project
To help the paint adhere well and to ensure the finish looks its best when everything is dry, it's important to prep your wood to get it ready. If you're painting an exterior surface or item, give everything a thorough wash to make sure there isn't any dirt, dust, moss or algae, all of which can keep the paint from sticking to the surface. If you're painting wood deck furniture, a table or something else for the outdoors that people will touch frequently, it's a wise idea to sand it before painting to give the paint something smooth to adhere to. Splinters and cracks can also keep the finished product from looking its best, and they're uncomfortable to sit on. Let the surface or or item dry out fully before applying the paint, and give it a few days to dry and start curing before you use it. It's best to do outdoor wood-painting projects while the weather is nice.
If you're repainting an interior surface or furniture such as kitchen cabinetry or a dresser, take a look at the existing paint or finish. If the item's current paint isn't chipped, cracked or bubbling, you can usually paint right over it; just sand the wood areas briefly to give the surface more texture for the paint to stick to. If you don't need to remove cabinet paint, it's still a good idea to clean the doors with a heavy-duty solution like TSP to eliminate all traces of grease and grime. If you do need to remove a little bit of paint, such as a few chipped areas, you can sand them down. However, you may need to use paint stripper for items with paint that's very damaged. This is a product that softens the old paint so you can scrape and wipe it all off.
A word of caution here: If your cabinets or other painted home surfaces were last done in the 1970s or earlier, they may contain lead-based paint. If you use a testing kit and determine there's lead in your paint, call the National Lead Information Center or your local health department to find out how to proceed.
Time to be real with myself: Doing makeup while standing (!) at my bathroom counter (!!) under that harsh, fluorescent light (!!!) is certainly not the vibe. So you betcha I'm jumping at the chance to get a good makeup vanity in my room. But as I shop around, I also realize that I don't need just any ol' vanity. No, I need me a makeup vanity with storage to hold allllllll the lipglosses and eyeshadow palettes that I've been hoarding over the years (we can talk about how this is gross and that most of my makeup is probs, most def expired another time).
So, of course, I did my research and came up with a list of the best makeup vanities with drawers (and even one with lights!). There's one for every aesthetic—whether you're a minimalist, an ultra-glam babe, or a mid-century enthusiast. See it all, below!
1
this one with a tri-fold mirror
Arch Mirror Vanity Table
Not only does this beaut have a tri-fold mirror and drawer space, but it also has a mesh brush holder and hairdryer slot hooked on the side.
2
this one that can fit a ton
Makeup Vanity Set
Six roomycompartments to hold all your makeup and skincare products?! A dream.
3
This gorgeous stone shade
Mid-Century Vanity Desk Set
Found: a S-T-U-N-N-I-N-G vanity with five (!!!) drawers and a sophisticated design. God, I love her.
4
this lil one
Mclamb Vanity with Mirror
This one is perfect if you're in need of something that won't take up much space.
5
this one with a flip-top mirror
Makayla Vanity Set with Stool and Mirror
What's up, this one is 43 percent offand comes with an upholstered stool!!!! Plus, it has a flip-top mirror, meaning you can definitely use it as a desk.
6
this one with gilded details
Blaire Classic Vanity Desk Set
For those who love gold accents and all things glam, this one goes out to you.
7
this traditional one
Tri-Folding Vanity
If your aesthetic leans a little more traditional, this all-white beauty would look so good in your room. Plus, it comes with a tonnnn of drawers and a tri-folding mirror so you can see yourself from different angles.
8
this gold mirror
Round Gold Mirror
You may not like vanities with attached mirrors, and that's okay! Here's a sleek and simple mirror that you can hang over the vanity of your dreams.
9
this gorge dresser
Lyra 4-Drawer Dresser
For all those who prefer doing makeup whilst standing up, I gotchu! This wood dresser with chic rattan drawers has so much storage space and is a great height for all your standing up while dolling up needs. (Also, it'll go sooo great with that gold mirror!)
10
this v modern one
Askern Vanity Set with Stool and Mirror
Well, damn. She's dark, she's moody, she'ssexy. And best of all, she comes with a deep drawer for storing all of your serums and makeup tools.
11
this one with a touch screen mirror
Vanity Set with Touch Screen Dimming Mirror
BRO, this vanity set comes with a light-up mirror that actually dims when you tap the screen! I love living in the future, especially for under $250.
12
this simple one
HEMNES Dressing Table with Mirror
IKEA coming through with this affordable, yet stylish option. It's a sleek design without skewing too modern—and that may very well be what your space needs.
13
this clean and simple option
Makeup Dressing Table with Round Mirror
Not in the market for something super ornate? Add this simple white one to your cart.
14
this tiny one
BRIMNES Dressing Table
No fuss, no frills. If you want something that gets the job done (and doesn't look like an obvious vanity in your room), go for this bad boy.
Kim DuongShopping EditorKim Duong is the shopping editor at Cosmopolitan, covering cute things that are actually worth your hard-earned $$$.
Megan UyAssistant Shopping EditorMegan is the Assistant Shopping Editor at Cosmo where she covers all things shopping within the fashion and lifestyle space.
This content is created and maintained by a third party, and imported onto this page to help users provide their email addresses. You may be able to find more information about this and similar content at piano.io
Laminate, which is also known as "floating floors" have come a long way since their original inception in their 1970's. Their design is meant to depict floor tiles or wood flooring and, when high-quality materials are in use, it's difficult to tell the difference at first glance. Choosing the best laminate flooring and installing it with precision helps with its incredible look and lasting durability.
How to Pick Laminate Flooring
Choosing laminate flooring depends on where the installation occurs, the room's décor, and your overall taste. For example, if you're replacing the flooring in a living room featuring modern décor, selecting flooring featuring a light tone is optimal. However, if you're working on renovations in a bedroom depicting traditional themes, lean toward golden or darker hues. Those who are switching out the flooring in bathrooms or kitchens, laminate flooring reminiscent of stone or tiles is an excellent choice, but wood is also beautiful.
Where to Find Laminate Flooring
High-quality laminate flooring is available in a broad range of styles and designs. You'll find this flooring not only featuring a myriad of colors and plank widths but also grain styles and stone choices. If you look at places like Costco laminate flooring, you'll get a bargain, but you may be sacrificing quality. Shopping online or overseas, like from a German laminate flooring, for example, doesn't afford you the opportunity to look at the materials. If you do decide to shop online, look for dealers you can trust like Unilin laminate flooring or Krono laminate flooring, for example.
Look for Durable Materials
Think about how much traffic the room you're working on receives. For example, if you're replacing flooring in the living room where the main entrance is, a lot of foot traffic is going to come through that door. Therefore, the utilization of high-quality and durable laminate flooring is critical. Otherwise, you'll begin seeing wear spots in the high-traffic areas within the first few years of use. If you're replacing flooring in the kitchen or bathroom, make sure you select flooring that's resistant to spills and can handle frequent exposure to moisture.
About Laminate Flooring Installation
If you don't have experience with flooring installation, it's best to work with a professional. Otherwise, it's possible to install this flooring using a compass, drill, drill bits, hammer, flooring nailer, measuring tape, pry bar, rubber mallet, wood spacers, and table saw. Under most circumstances, laminate flooring comes with installation instructions, but you have to make sure you have tools ready to use. If you select discontinued laminate flooring, check with the dealer to ensure installation guidelines are available.